Showing posts with label Diorama. Show all posts

M4A3E2 Jumbo Part 2 Modifications

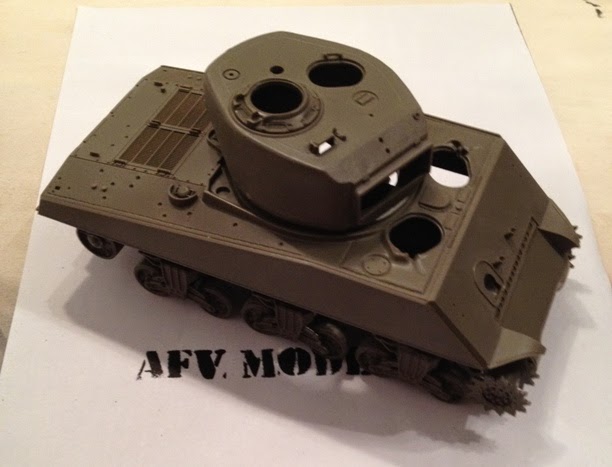
Modifictions are done at all handles on hatches, at turrets back the Cal. 50 brackets are done with brass. The lock for the loaders hatch was scratched build.
The Transmission noise was covered with extra putty, a stiff brush was used to simulate the cast effect.

Missing:
Cast effect at turret sides.
Welding seam at front armor
T-48 tracks
brass brackets for wood  at front
Jerry cans and stowage material


My trip to:
http://afvmodelling.blogspot.de/p/band-of-brothers.html

M4A3E2 Jumbo Part 1 Assembly

Started the Tamiya Kit M4A3E2 Jumbo Assault Tank in 1/35 scale. The Kit is a old modified one with some extra armor at front and side.
The Tank comes together very fast and took me approx. one weekend busy.
I will split the built in four parts.
Part1: Assembly
Part2: Modifications
Parts3: Coloring and Figures
Part4: Diorama


The original Cal. 50 machine gun will be replaced with Academy one

My trip to:
http://afvmodelling.blogspot.de/p/band-of-brothers.html

US Tanker

John Rosengrant's superb US tanker figure from the S&T series has arrived from Ebay.

 
My trip to:
 http://afvmodelling.blogspot.de/p/band-of-brothers.html
http://afvmodelling.blogspot.de/p/band-of-brothers.html

Dobleside Diorama Merkava

One Side Israel and behind the wall palestine, start with the dobleside diorama, the wall was made from plaster and a mould from LEGO bricks, the color is stone grey with black preshading. The sand on Palestine side is from NOCH and glued with water and white wood glue, the Israeli side will be made in different technique, the Merkava tank need also more weathering at the lower side, at moment looks still to smooth, let´s have a look wenn the ground will be made I take care about the wheels and the skirt.


Merkava Diorama

Placed all together (Tank, roadblocks) on a Photoframe 30x20 cm, the glass was removed and a plastic floor was glued in.


Roadblocks

How to make roadblocks for your Diorama, the Roadblcoks are used as barrier for tanks, trukcs and other vehicles. Two or three of thme can close a whole street.


For my roadblocks I´m using plaster (Gypsum) and mould, the first mould was from plastic card scrtched built, the porblem was I used it only twice befor it break down complete,
the edge length is 30mm what is 1050mm in original.


LEGO was the solution, after the cubes can be re-shaped with a knife and at the corners I drilled
two holes where the hooks can be glued in.


FINISHED ROADBLOCKS